Make Your Windows 10 Feel Fresh Again
My practical Windows 10 cleanup routine after lag, crashes, and a surprisingly busy system process started getting in the way.
My Windows 10 computer had started feeling tired. Not dramatically broken, just slow in the annoying way that makes every small task feel like a negotiation.
I noticed it while working on a project using Oh My Pi and Orca. Oh My Pi kept lagging and eventually crashed. Since blaming the computer is easier than blaming my code, I opened Task Manager to investigate.
One process immediately caught my attention: Service Host: Network Service. It was using around 30-50% of my CPU.

Because this is an internal Windows process, my first thought was, “Great, is this a virus now?” It might have been a problem with another program using the service, or it might have been something else entirely. I did not know yet, but the symptoms kept piling up.
Apps started lagging, running out of memory, or crashing. Even Discord became unreliable while I was sharing my screen with a friend and talking about vibe UI/UX. A crash in the middle of a design discussion is a very effective way to make the design less fun.
That was my sign to clean up Windows. I realized I had not done a proper cleanup in roughly one or two years, so I decided to give the system a deep-cleaning session.
Step 1: Scan for malware
First, I ran antivirus tools. Please do not use cracked antivirus software. It is a little difficult to improve your computer’s security by installing a mystery program from a suspicious website.
Free tools are fine if you choose reputable ones. I used Avast Free together with Malwarebytes Free, then ran file scans. They found several suspicious files and quarantined them.

Before permanently deleting quarantined files, review what was found. Antivirus tools can sometimes flag a clean and familiar program by mistake. Do not restore something obviously suspicious, but do make sure you understand what you are removing. Once you’re done, you can keep the antivirus programs installed or uninstall them. I prefer uninstalling them afterward.
Step 2: Repair Windows system files
Next, I used Windows’ built-in repair tools. These check different parts of the operating system and can fix damaged files.
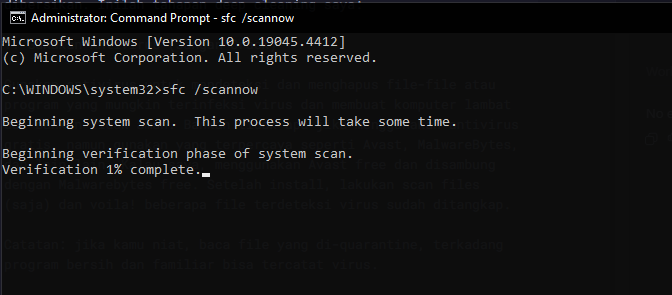
Open Command Prompt or PowerShell as an administrator, then run these commands one at a time.
Check protected system files with SFC
System File Checker, or SFC, checks protected Windows files and replaces damaged or missing versions with correct copies.
sfc /scannowRepair the Windows image with DISM
DISM stands for Deployment Image Servicing and Management. It repairs the Windows system image, which is the source Windows uses for system files. It can help when SFC cannot finish the repair on its own.
dism /online /cleanup-image /restorehealthCheck the drive with CHKDSK
CHKDSK checks the file system on your hard drive or SSD. The /f option fixes logical errors, while /r looks for bad sectors and tries to recover readable data.
chkdsk /f /rThis last command can take a long time, especially on a large or older drive. Windows may ask to schedule the scan for the next restart, so save your work first.
Step 3: Remove unnecessary files
For the cleanup itself, I used BleachBit, a free and open-source tool for removing cache files, logs, and other digital leftovers.
I mainly used it to clean cached files and logs. I expected that to free some space, but I did not think it would make such a big difference. It freed around 8 GB from my system drive. Not bad for cleaning up what looked like simple leftovers.

Step 4: Review Windows settings carefully
The Chris Titus Windows Utility should already be familiar to many people in IT, haha. It is a popular tool for fine-tuning Windows from one place. I used it to disable a few Windows 10 features I did not need, including Windows Update, Windows Defender, and some others.
Open the Tweaks tab, choose the Standard preset, and click Run Tweaks. Here are the tweaks I used:
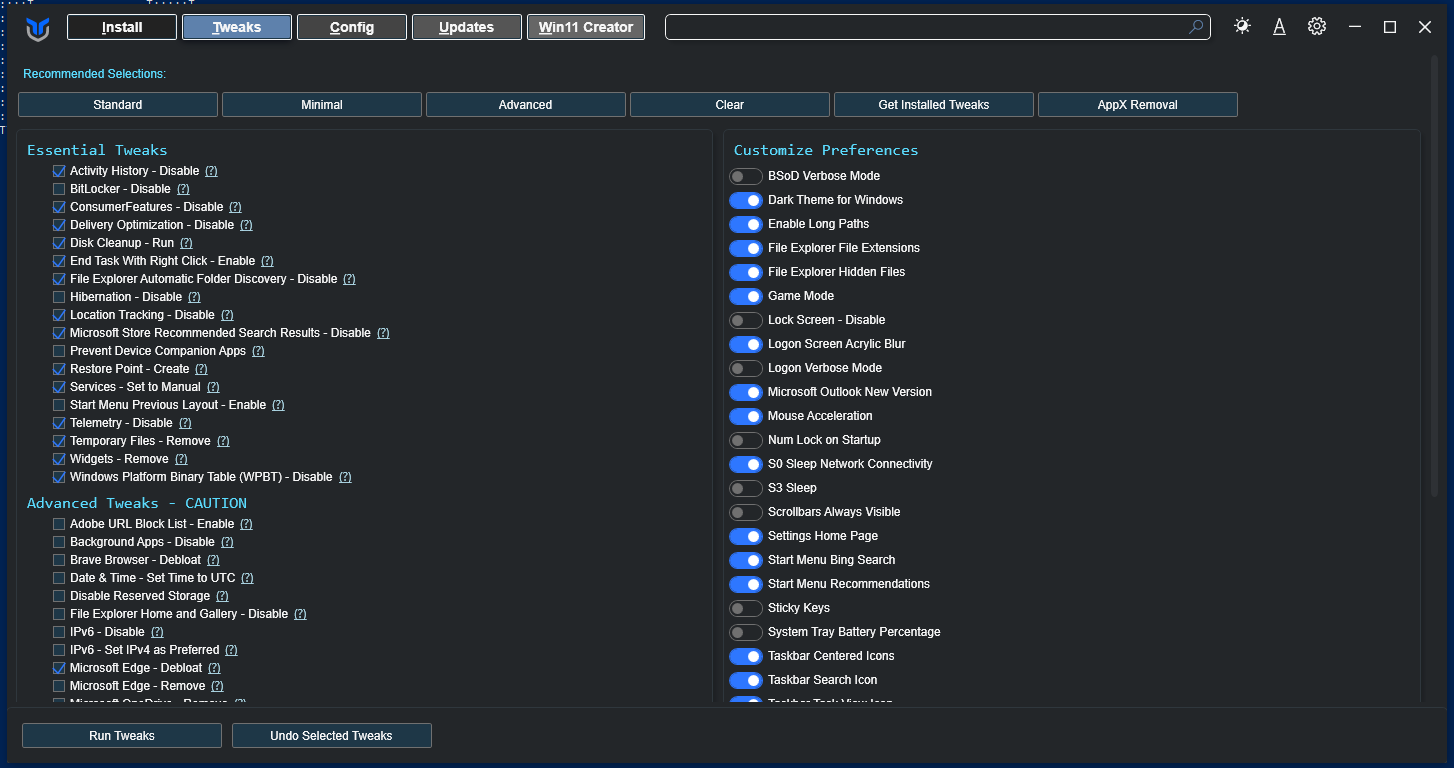
The utility also includes update-related settings:
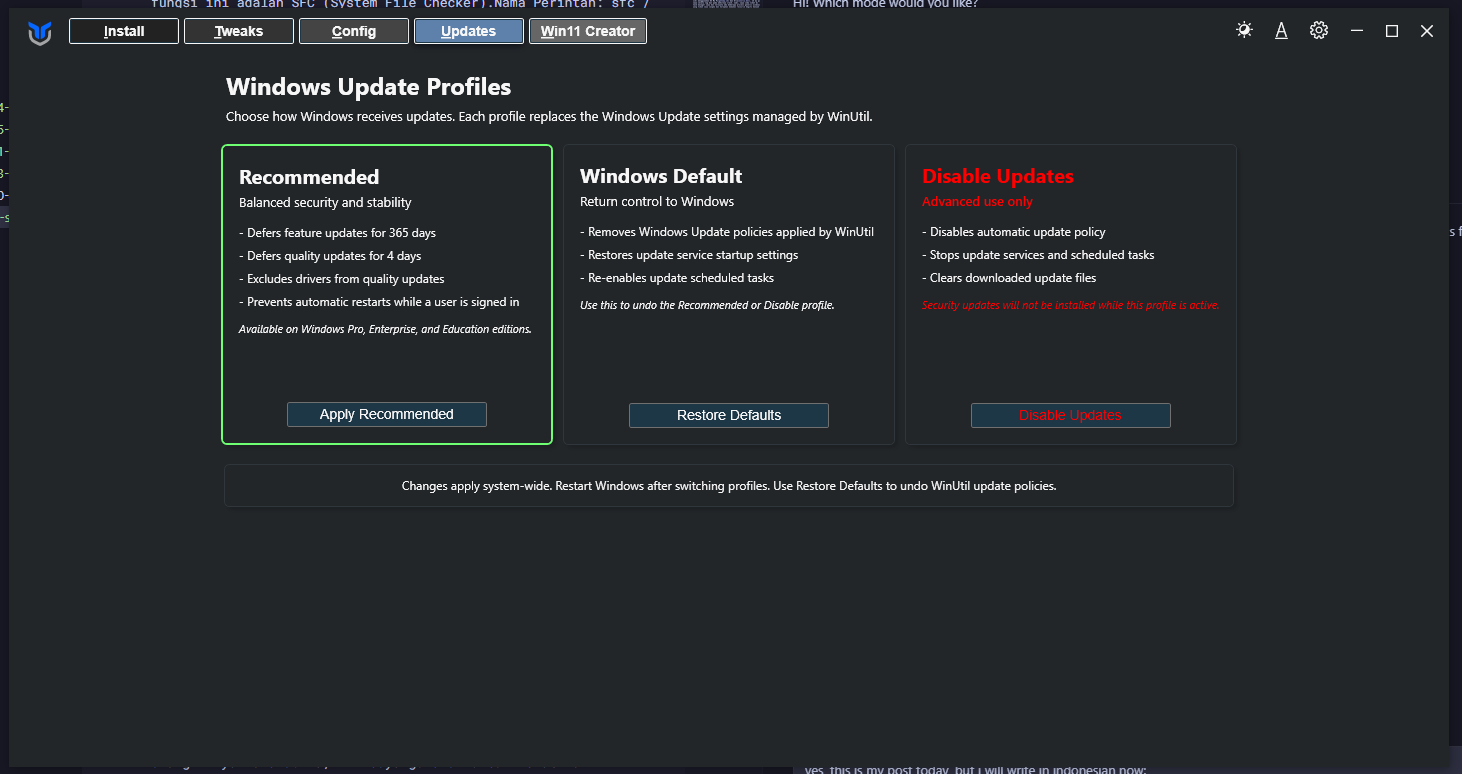
For my setup, I always disable Windows Update when it keeps consuming too many resources or repeatedly causes new crashes. Turning updates off made the system feel much more stable. Just remember that you will need to manage updates manually later, especially security updates.
The result
After the cleanup, my computer felt much more responsive. Coding became enjoyable again, applications stopped crashing, and Discord went from barely opening to working normally. Don’t ask me why Discord suddenly recovered. Maybe it was the cleanup, maybe it was a combination of repairs, or maybe Discord simply decided to forgive me. Let’s just call it a small Discord miracle. Either way, I was happy to stop troubleshooting and get back to work.
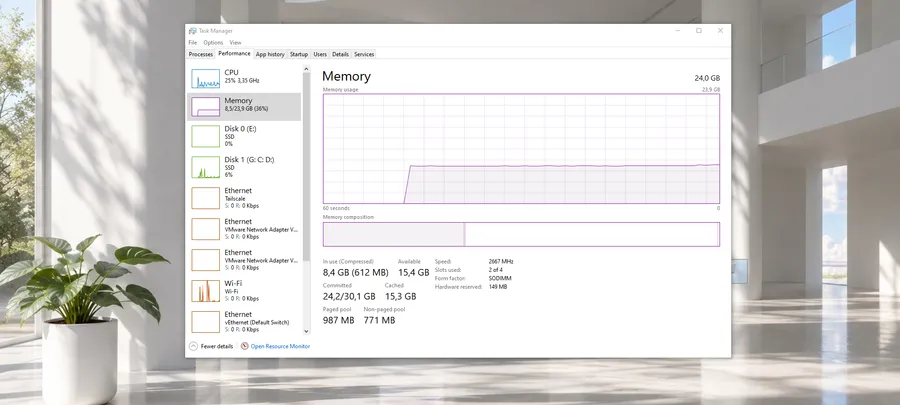
Here is the result after the cleanup:
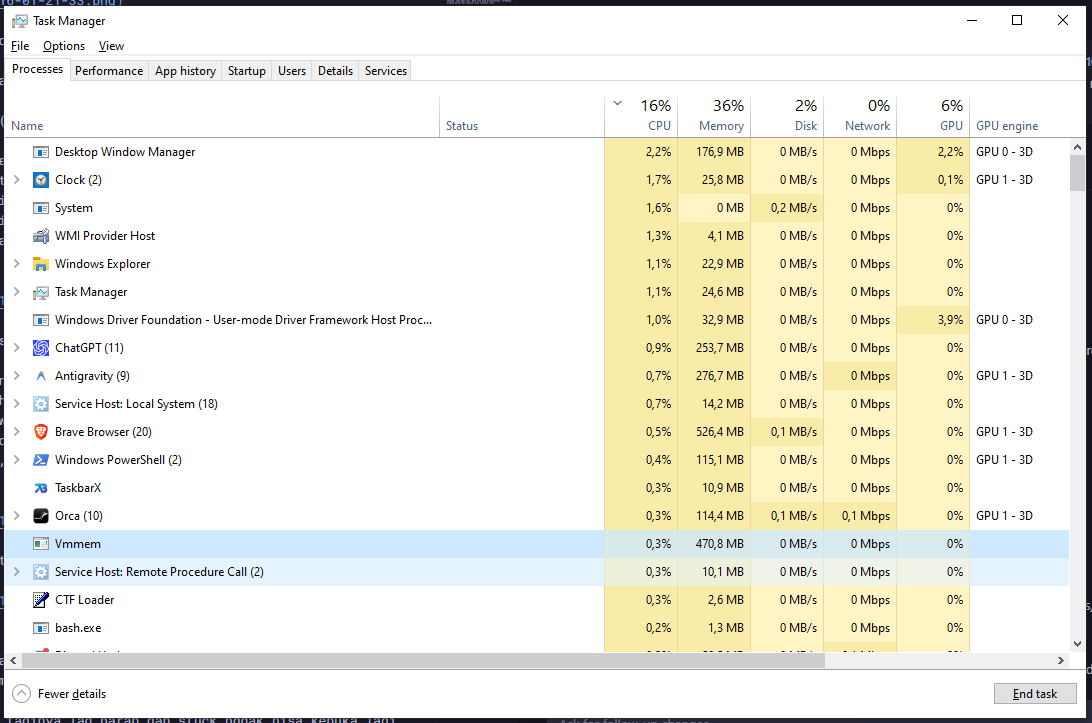
CPU usage and the other resource numbers look much more normal, even with several applications running.
This is not a guaranteed cure for every Windows problem, but it gave my aging installation a fresh start. If you have another Windows cleanup trick that works for you, feel free to share it.
Comments